

This is a way to document your baby's growth and development month-by-month (or week-by-week or even day-by-day if you're really feeling ambitious)! Take a photo of baby in the same location, generally wearing the same outfit (different sizes) and documenting the age either on their clothing or labeling the photo. You can also put baby next to an item (like a stuffed animal) to show how much they've grown. I'd never heard of this until I was about four months pregnant and starting seeing them everywhere:
Making it Lovely starring sweet pea, Eleanor. Nicole probably has one of the most beautiful versions of this idea. She puts her daughter, Eleanor, in a rocker wearing a pink onesie with a little felt pin listing the month. She made the pin herself (here's the how-to). She is photographing Eleanor through age two and it sure has been fun watching her grow.
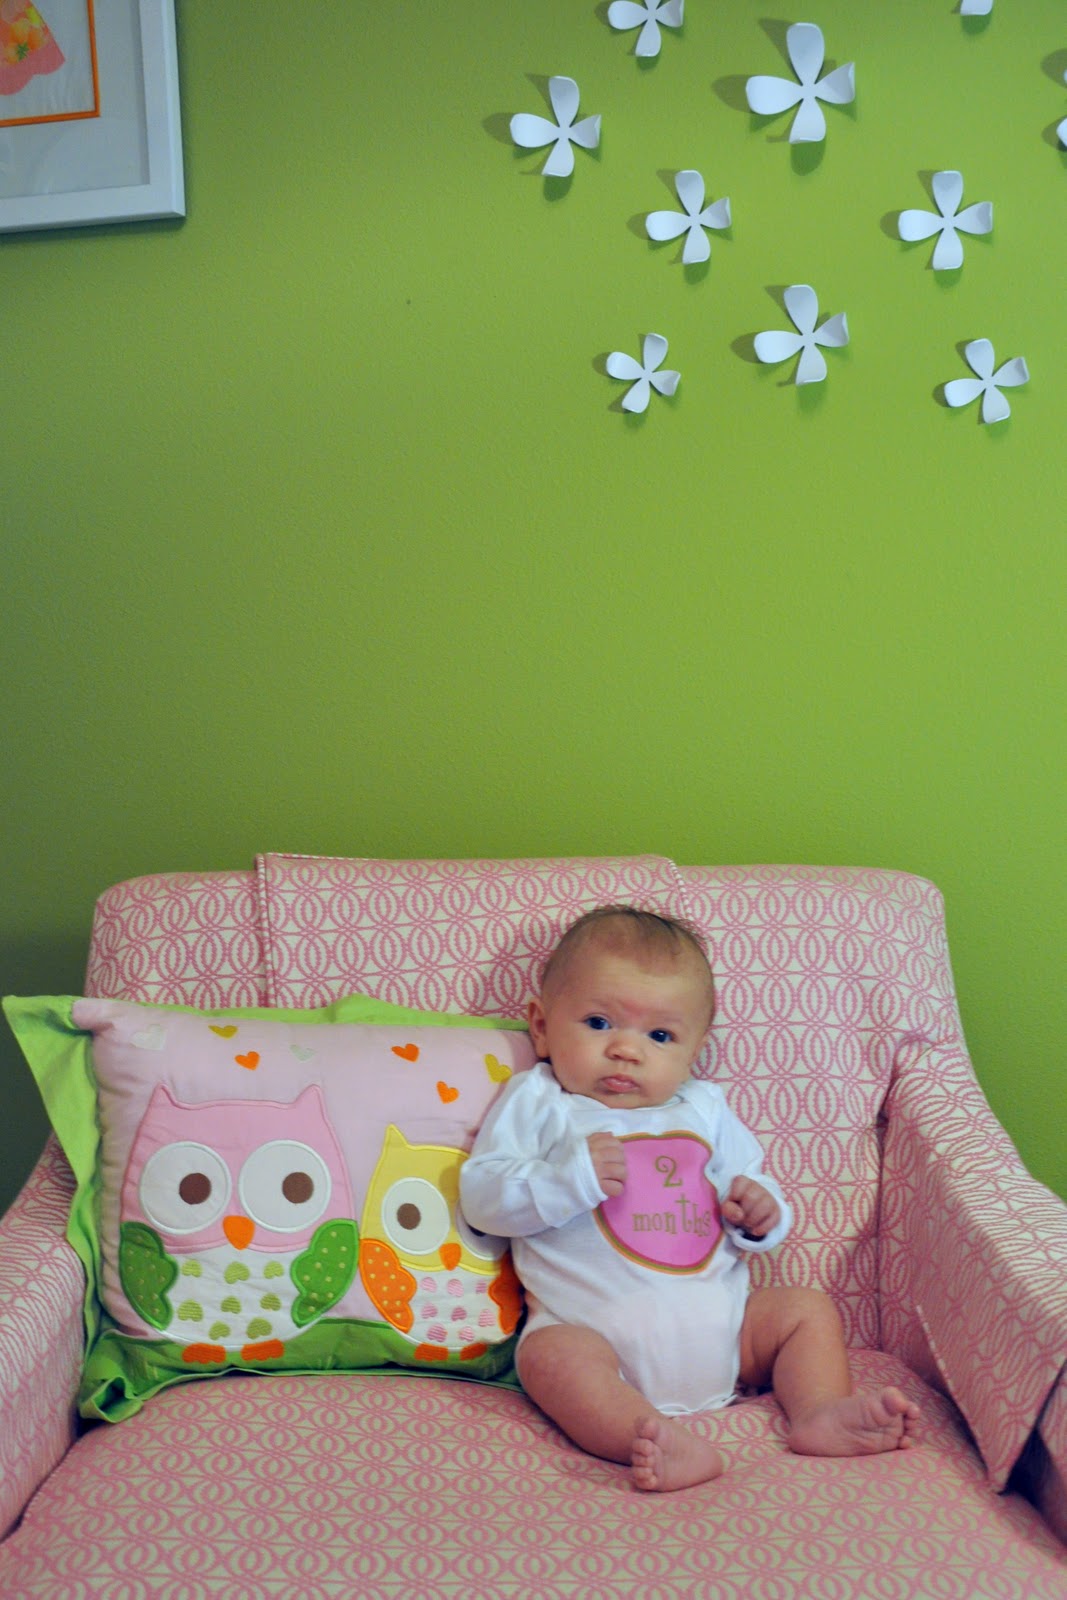
My Life in Transition's version with super-cutie, Truman. Julia photographs Truman each month in homemade onesies sitting in a colorful chair in his nursery.
Young House Love's spin of their dear Clara (weekly photos). Sherry places Clara on a different piece of fabric each week and takes her photo wearing a plain, white onesie against the colorful fabric. Sherry uses Photoshop to include the week identifier. Here is their how-to.
Etsy sellers offer pre-made monthiversary onesies. I did this for a friend before I decided to give it a whirl for myself. It is considerably more expensive than doing it yourself, however it is less work! Argyle Violets is the seller I used on Etsy. Oh my, good thing I didn't know about her owl version. Too cute!
Tips and Lessons Learned on Making Monthiversary Onesies:

Purchase light-colored onesies (or other clothing). Dark colors need special transfer paper and trust me - you don't want to mess with it (see above for some failed projects). I use plain white, long-sleeved onesies. These are great for layering and it is chilly here in the Northwest. We need sleeves here! I purchase mine as I go because I never know exactly what size Elyse will be in the future. This is ideal, however, if you are planning ahead or making gifts, you can guess on the size. I'd recommend buying a size bigger than you think. I'd rather have the onesie swimming on baby, then have a fussy baby with a tight outfit.
Buy Avery brand stretchable fabric transfer paper and it works great. Do not try a different brand. I ran out one day and got some store brands. One didn't work at all (it would NOT adhere to the fabric) and the other wasn't the "stretchable" type, so as Elyse moved around the image broke up a bit.
Use this template from Mama at Home to create your image. You can create your own if you are are feeling super creative, but these are easy to use templates made these using Word 2007, but any version of Word should open these without a problem. You can change the colors and the font if you want. I did - I didn't want different styles/colors every month. I wanted consistency and something that matched the backdrop.
Print out your images. Try to get two images on one sheet, if you can, to save paper. Choose the iron-on or mirror image option in your print properties so it prints correctly (backwards!). Cut around your image - OK to leave a bit of space, but make sure you cut somewhat evenly.
Time to adhere the image. (Please read the instructions that come with your labels, but here are my own tips). Heat up your iron on HIGH, ensuring you've poured out any water and are using the "No-Steam" setting. Place your image on the onesie. I hold mine up to the light, so I make sure I've placed it the right way and it is centered appropriately. Iron on a hard surface (NOT an ironing board). I use a window seat in our guest room or on a hard book that I don't mind getting hot. Put a pillow case over the image and press down firmly. Do not rub, but press hard and ensure you are taking time to press down on the edges. I flip over the onesie and do the same thing on the back. I set it aside and let the fabric cool. Once cooled, gently pull at the edge and remove your image. Voila - you will have a crisp, clean image adhered to your fabric!

Time to Photograph Baby! Decide when a good time of day is for your little one. Elyse is usually happiest after her first snooze of the day. Make sure they are happy and not hungry. I open up all of the blinds in her room, turn on her lamp and overhead light and even bring in an extra light to make it as bright as possible. You do not want to use a flash, so even if using a point-and-shoot, turn the flash off. Without the flash, you need all the extra light you can muster! I started using a tripod and remote after a couple of months (they are very cheap!) and it made things a ton easier. You are going to be trying to entertain the little one, keep her from falling over (when she is a newborn) and it is nice to be able to just click when you want to take a shot. Plus, a tripod helps eliminate the blur you often get when not using your flash indoors.
Take a ton of pictures. I just click away. Month one, Elyse was good for the first pic, but got fussy immediately afterward. Fortunately, I had just one that one photo. Don't get hung up on the picture not being that great. That first picture of Elyse? I didn't really like it at the time. I wished I had smoothed her hair and got a sweeter face from her. You know what? I LOVE that picture now.
I've had so much fun with this. I made iron-on shirts for all of our nieces and nephews with their names on them for Christmas.

I made Elyse a little shirt with her name and a pink owl when she was tiny. I have kept it as a special keepsake.

Use these steps to personalize whatever you want. I see a personalized doggie shirt in my friend Linda's future once she reads these instructions. Have fun and please share your projects with us!
Hee, hee... love the shout out! :-) So, just using regular ink from your printer? But can you wash them and it lasts and doesn't bleed or flake off? Didn't realize that you did this just with avery paper. Thanks for giving me another project!!! I was just about to spend $15 on a little onsie for my friend that has a Boston Terrier on it, now I can make my own!
ReplyDelete